Products and stock
Organising products into categories
Group your products so shoppers can browse by type, and give each group its own page, picture and description.
In the consoleOperate → Products → Categories
Categories are optional — your products work fine without one. They are worth adding once you have more than a handful of products, because they become the links in your store's menu and give shoppers a page for each type of thing you sell.
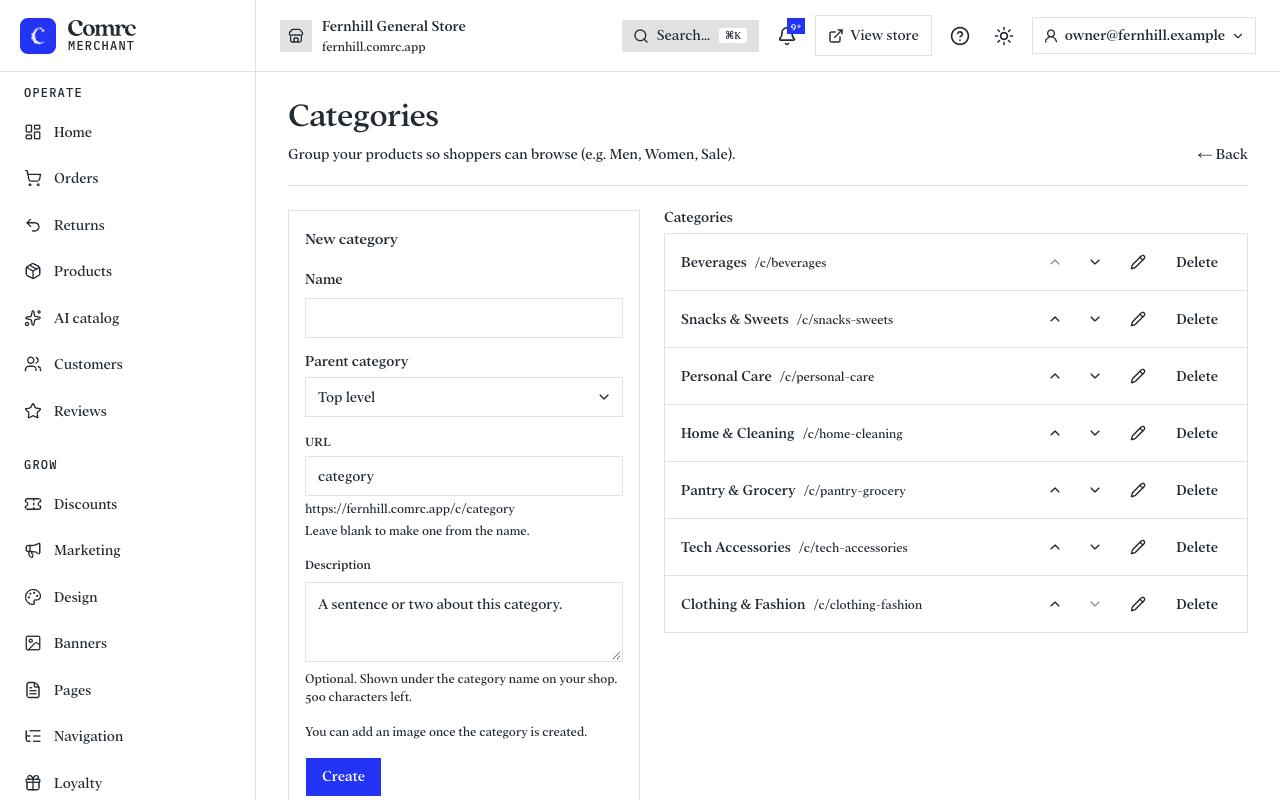
Add a category
- Open Products and press Categories.
- Add a category with a name, such as Women, Mugs or Sale.
- Open it to add a short description, shown under its name on your store, and a picture. Square pictures work best. Without one, your store shows a photo of a product from the category.
- Open a product and choose its category.
Where categories appear
- In your store's main menu. By default it lists your top-level categories, in order. You can choose different links under Navigation.
- As tiles on your home page, if your design includes a category section.
- As filters when a shopper searches or browses.